Dragon Eggs-
One of the first art/science activities we did was transform our plain chicken eggs into dragon eggs. To do this I took four of our blown out eggs and cut a slit into the shell, to make a small opening. Next, I got a glass jar for each of my kiddos and let them pick their food coloring. I then let them put a few drops into their jars. Next, I boiled a pot of water and added in some borax (I added 3 Tablespoons of borax for each cup of water), once the borax was dissolved I poured the boiling water into the jars, and added our eggs (I used a butter knife to gently push the eggs down so they would fill with water and sink). I let the eggs sit for about 24 hours before taking them out. When we removed the eggs we had beautiful crystallized dragon eggs.


Splat-tastic Eggs-
We also filled a dozen of our blown out eggs with paint (I made the hole in our eggs a little bigger so I could pour the paint in). Next, we took our eggs and a large board (I would recommend a large canvas but we used what we had on hand) outside. Once we were outside I had my kiddos take turns picking an egg and tossing it at the board. The end result was as messy as it was stunning.


Nail Polish Marbled Eggs-
Using the remainder of our blown eggs my daughter and I tried making the marbled eggs using nail polish that we had seen on pinterest. It was simple enough and they did turn out pretty well (I think I would have liked them better if I had purchased nail polish just for this and had more control over the color combos). All you need for this project is some new or old nail polish (we cleaned out or nail polish drawer), a glass or tuber-ware dish (that you do not mind getting ruined), and room temperature water. Fill your dish or cup with water, drizzle your nail polish onto the waters surface, and then dunk the egg (I would recommend using a glove for this). That is it three simple steps to an egg-excellent work of art.


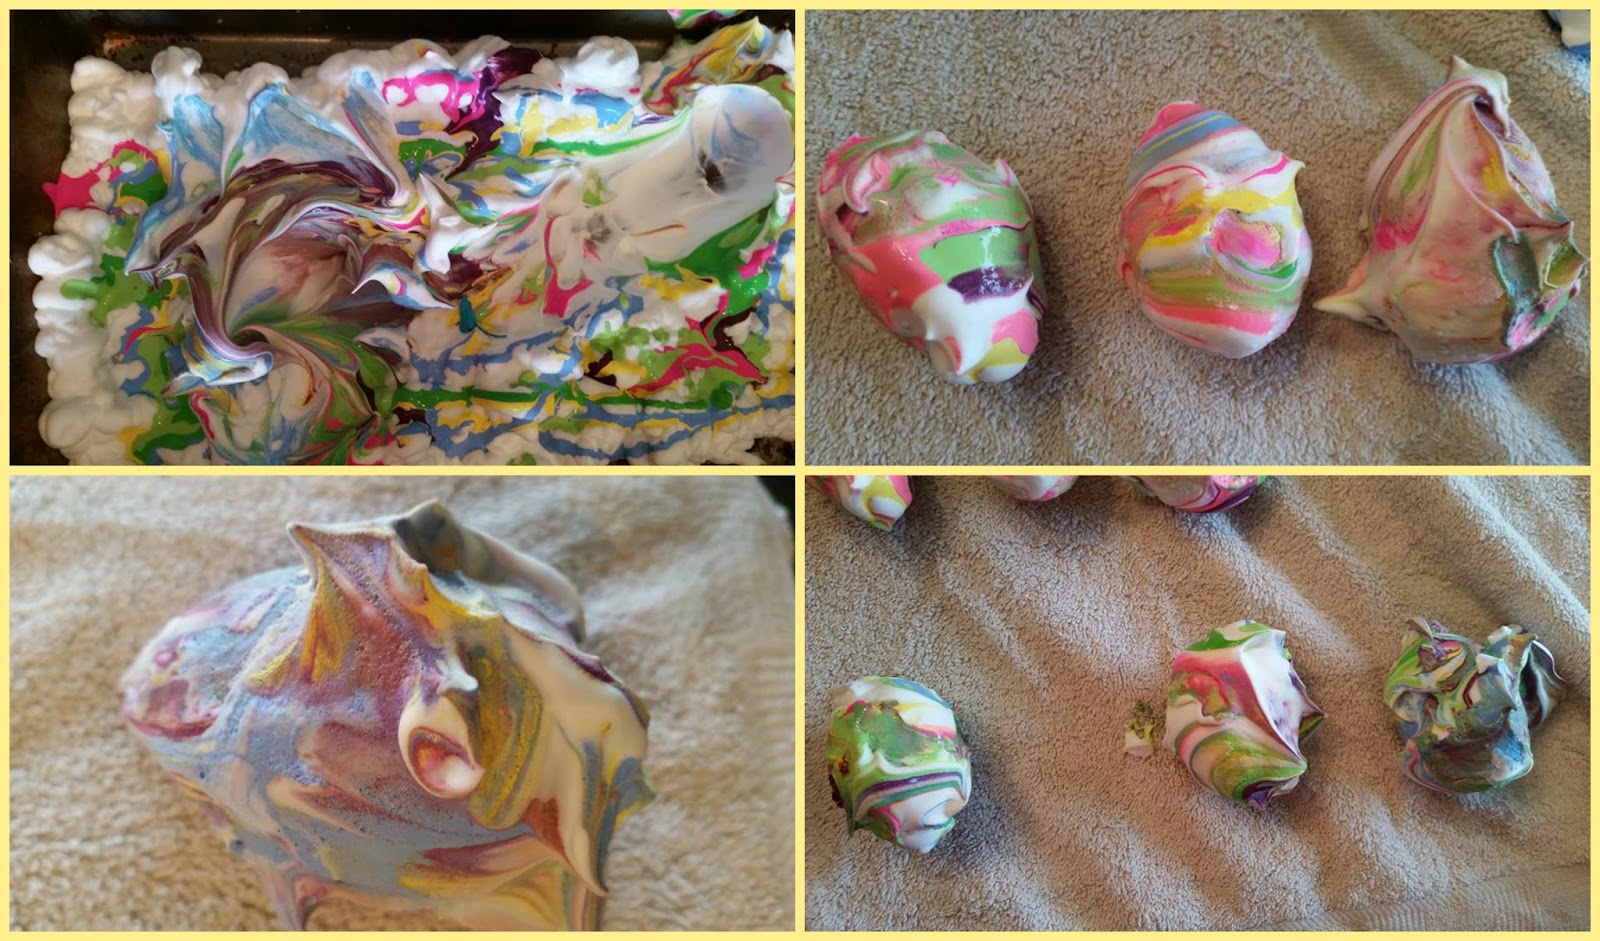
Shaving Cream Marbled Eggs-
For this activity we used store bought plastic eggs. You could easily use blown eggs, but I did not trust my three kiddos to be easy with the fragile eggs. All you need to do is fill a bowl, pan, or cookie tray with shaving cream and then drizzle some paint onto it (we used acrylic paint in springy colors). Next, roll your egg in the shaving cream and paint. When you take the egg out it will still be covered in shaving cream do not wipe it off yet, instead, let the egg sit for about 10 minutes and then wipe it off. Once you wipe off the egg you should be left with a beautiful marbled egg.


So there you have it four fun ways to use eggs this Easter. If you try any of these activities I would love to hear about it or see the pictures.
Wait! Here's a special Easter Bonus... Just because I love holidays and crafting!!!
Easter Egg Hunting Tote-
I might be the only person on the planet who feels this way but I absolutely hate pails, buckets, and baskets for Easter Egg Hunts. They spill easy which results in frustration for my kiddos. I like how well shopping bags work but hate how they look, especially in pictures. So last week while shopping in my local Target I stumbled across a solution. I found canvas totes knew they would be perfect once I added a cute Eastery image to them. So I purchased four and hurried home. As soon as I got home I searched the interenet for the perfect image, copied it into word, enlarged it, printed it, and finally cut it out. Then, I traced the image onto the tote bag. Finally, I hand painted the images and personalized them. And that is all there is to it. So simple and so cute.
Piece of advice- Do not craft around cats, my daughters cat is responsible for the green splotch on the peeps bag. Darn Cats.